Outside
This "before" picture isn't fair because it's after the paint was already being scraped off. But it's the best picture I have of just how pink she was.
My most favorite "after" thusfar. After washing, scraping, and painting.
Master Bedroom
We started with pink walls and pre-sanded floors. With a little paint and lots of decorations, we've come a long way.
Master "Small" Bathroom
Hallway
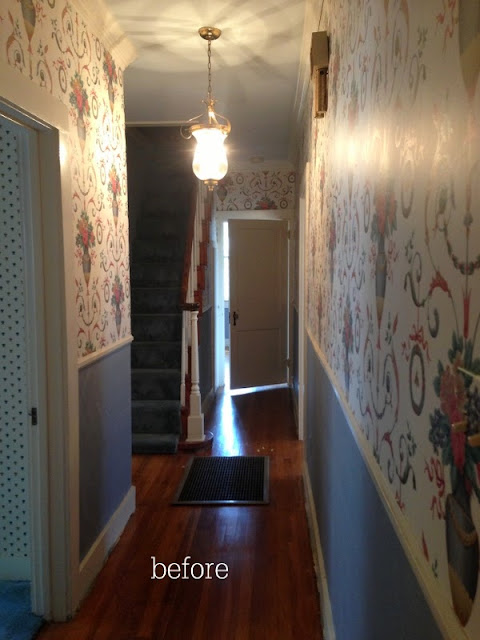
This is how the hallway looked on day 1.
And here is how it looks now after: sanding floors, removing wallpaper, refinishing the staircase, removing the floor heater, doorbell, and light fixture.
And the finale until we finish electrical work. Can't wait to see that hole in the floor go bye-bye!
Middle Bedroom
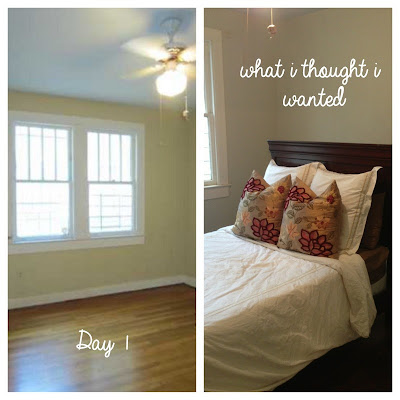
Then, I fell in love with these pillows and they're here to stay. Still needs lots more furniture and decorations/curtains and we plan on replacing the baseboards and adding crown down the line. The few changes we did make were: replacing the ceiling fan, refinishing the floors, and painting the walls.
Where we are now... still eh.
Front Bedroom
Progress pic coming soon :) So far, we repainted, updated the electrical work, and removed the window unit that was built into the wall.
Living Room
We're working on our living room right now. Can't wait to show you the finished product. Here's a few befores.
Dining Room
Here's a before shot of the dining room. Keep in mind, we have no overhead lighting in the dining room, kitchen, OR living room at this point.
And and after. You can read all about our dining room adventures here, here, here, here, and here. If you want to see more after pictures, you can go here.
Kitchen/Keeping Area
Once all the bathroom stuff is out of the kitchen, I can take a progress pic :)
Upstairs
I mean, do you even need a description? And it still looks like this today.
Upstairs Bathroom
Day 1 and now :)
Downstairs Hallway Bathroom
I thought I took so many before pictures, but apparently I didn't do a good job in certain rooms. Day 1 of the "big bathroom".
And now. We have removed the carpet and replaced it with ram board because the tiles were in such absolutely disgusting condition.
Yay for the house tour! Notice anything you didn't notice before? To take it a step further, I am going to make a running to-do list of things we have in mind to-do for each space + the things we've already completed. I'll attach the link to this post soon.


I LOVE LOVE LOVE houses like these!! So happy to see the little old pink house transformed into a complete gem! So charming and cozy! You guys are doing an AMAZING job with the redo! :)
ReplyDeleteThank you so much Jennifer! Your comment completely MADE my morning! :) Thanks so much for the sweet words. A charming, cozy gem is exactly how I have it envisioned! Thanks for following along!
DeleteWhat a remarkable job you guys have done with the renovations. Eris, you definitely had a vision for this house. Seeing it from the beginning, I know all the hard work it took and it looks amazing! I hope you are taking some time to "relax" and enjoy it. Great Job.
ReplyDeleteHaving a ‘house tour’ segment in your blog is a great idea. This will document all the progress of your renovation, and see if it’s progressing well or not. And I can say, judging on the look of your house now, it is progressing very well. This is particularly true with regard to your house exterior; the color is just perfect. It adds a touch of modern times to your house and makes it more inviting.
ReplyDeleteWilma Matthews @ Andy's Painting
Hello, it's a great piece of content. Thank you for sharing this interesting blog post, and good work. When any of these delicate parts are harmed or the link between the liquid crystal and the electrode array is destroyed, a dead or Stuck pixels may occur. Dead or stuck pixels can also result from physical damage to the liquid crystal layer or a manufacturing flaw.
ReplyDelete