Did y'all know that was a thing? I didn't. It actually sounds kinda gross, no? Then again, I only use plastic drop cloths because they're like $1 so this world of canvas drop cloths was foreign to me. Apparently it isn't foreign to the blog world or the Pinterest world. EVERYBODY and their Mom has done some type of drop cloth curtain. The best part is that it is a NO SEW project. All the hems are already there. Unless you need yours shorter or would want to make a pocket at the top, you are set.
The reason I'm struggling with curtains for my bedrooms, as I've mentioned before, is because I need 108 length. That can get very pricey. Even for a very basic plain jane white drape. Canvas drop cloths are 6ft x 9ft. Perfect length! The width is a bit of a stretch but the way you hang them makes all the difference.
I literally read about it and then hopped in the car! So here's the canvas drop cloth that I purchased from Lowe's.
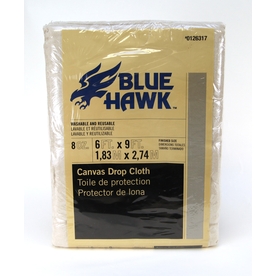
Actually you need two. One for each side of the window. Price tag? $10.98 for one. For a DRAPE.
Other materials needed: paint (if you want to paint a pattern onto them - yes you can paint these bad boys!), an iron, a paintbrush and painter's tape, and a curtain rod with curtain clips.
While I was gathering my materials and coming up with a paint scheme, I threw these puppies in the washing machine so I would be ready to go! Just because I was painting them, doesn't mean that you have to. Tons of people hang them right up after they take them out of the dryer.
Here's some of my inspiration photos.
 |
| Image via The Yellow Cape Cod |
 |
| Image via Cole and Audra Blogspot |
Can you tell what pattern I'm interested in? (That black and white one might even make an appearance somewhere in this house.) But people get so fancy pants. Some people have awesome stencil work that they do that I'm sure takes hours. Really impressive stuff.
Here's a basic plain one right out of the packaging.
 |
If you're into the burlap look, these work perfect right out of the package.
The most time consuming part of this process was the taping of the drop cloth. I measured every 14" for my stripes. I decided to just do two white stripes on mine. These are going in my middle bedroom which is all white to begin with. I thought more of the tan color would kinda break all that up. I used my level and agonized over whether the lines were straight or not, but it really doesn't have to be perfect considering I'm making pleats at the top out of curtain clips. It just has to match up with the other curtain.
Stripes are down!


Tip: When you paint by the tape, it's better to angle your paint brush this way so the paint doesn't creep up under the tape. And using a roller is easier if you're doing basic stripes. The coverage is better. Also, make sure you put some garbage bags under where you are painting if you are painting indoor - the paint goes straight through.


Since they are so large, I painted them one at a time. Once the first panel was dry, I used it as a guide when it came to tape the other panel. If you're impatient, this probably isn't the project for you :)


And here they (well you're only gonna see one) are hanging in my middle bedroom. Notice a new arrangement anyone? :) In picture 1, there is a round nightstand, and in picture two there is a square nightstand. Still deciding. Regardless, that lamp is going.


And as for that curtain rod. I did it myself. I found a cheap basic curtain rod at Target. I'm talking $15 cheap for a 84-120 inch rod. Got some $4 curtain rings and a can of spray paint.

So my entire window from top to bottom cost me $50. For the hardware, curtains, paint, etc. Not too shabby.
P.S. Josh did the curtain rings at the top. They are all off center and sporadically placed. I'll adjust all that once we put some final touches on the room. What can I say, I was too busy watching the Bachelorette.
What do you think of drop cloth curtains?


Ok where have I been? I stalk pinterest and this is the first time I am seeing this! I have been trying to decide what to do in the baby's nursery. It will be a pretty neutral nursery. There are existing shades in the room that Thomas's grandmother had made with basic canvas material. I wanted drapes that I could coordinate with them because i really wanted to keep them in the room. Ta-da! Thanks for the tutorials too! So excited about this. Thomas will be too when he hears the price :)
ReplyDeleteBrittany
I know isn't it awesome!? It was the first I had seen of it too. I couldn't believe it! If you Pinterest it even more, you'll find all sorts of neat designs and ideas. Happy I could help :) Share yours when you're finished!!
DeleteP.S. I like the square nightstand. It goes with the lines in the room, for instance, the Curtains and Bed frame :)
ReplyDeleteDon't tell anyone, but that's the one I picked too :)
DeleteWow-- impressive. I agree, why are drapes so stinking expensive?! I would have probably obsessed about taping off the lines too, btw. All in all, I might try this!
ReplyDeleteI love that this project is budget-friendly and easy.
ReplyDelete